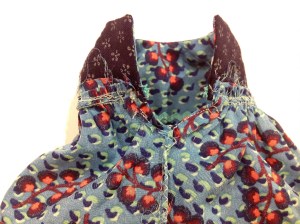
Mini doll dress pattern
This dress will fit a mini American Girl doll or Our Generation doll (around 6″). I made a small Waldolf doll (about 8″ high) which it also fits. The fabric in the pictures is a gorgeous Liberty fabric from one of my lovely local shops, Clothkits.
what you need:
- 1 fat quarter main fabric (choose a lightweight cotton)
- small scraps of a lining fabric
- ric rac or other ribbon for embellishing
- small bow or button
- matching thread
- 6 inch doll dress pattern
how to make your dress:
Cut out your pattern and pin the pieces on the right side of your fabric. Cut the following:
- From main fabric = 1 x bodice front, 2 x bodice back (1 reversed), 1 skirt
- From lining fabric = 1 x bodice front, 2 x bodice back (1 reversed)
 Pinning the pattern
 The pieces cut out
Place main fabric bodice front and back pieces right sides together and sew at shoulder seams. Repeat with lining fabric.
 Sewing shoulder seams
Place bodice lining and main pieces right sides together and sew around armhole edges and neck, including the centre back edges:
 Sewing armholes, neck and back of bodice
Turn the bodice right side out through the shoulder – this is a bit fiddly but persevere.
 Bodice right side out
Press bodice. Open out side seams of lining and main fabric of bodice and stitch side seams with right sides together. Press again.
 Sewing sides of bodice
Hem the lower longer edge of the skirt by turning over raw edge twice and pressing, then stitch. If using, sew on embellishment (e.g. ric rac) close to the bottom of the skirt.
 Hemming the skirt
 Adding ric rac
Stitch two rows of wide stitches to the long top edge of the skirt to form gathering stitches.
 Gathering stitches
Fold in half with short edges and right sides together and stitch centre back seam – stopping 3/4″ from the top (see the dot on the pattern).
Gather the top of the skirt by pulling the stitches. Then pin, right sides together to the bodice (the bodice will be upside-down). Line up the openings at the back of the bodice and the top of the skirt.
 Pinning skirt to bodice
Stitch around the top of the skirt to secure the bodice to the skirt. Press the seam upwards. Stitch around the opening on the skirt.
 Finishing the back of the dress
Then on the right side of the fabric topstitch around the bodice, adding ric rac or ribbon as you go.
 Finished dress
Add a snap fastener to the top of the bodice at the back to close.
Then you’re done! I hope you like the pattern – Happy New Crafting Year!
 ‘Autumn’ modelling the dress
 Same dress pattern, whole new look!
Who wears it best?!