 We all know that keeping the kids entertained on a long journey is tough. Some good old fashioned colouring and puzzles gives them a break from playing computer games or watching movies. There are lots of colouring pages and puzzles online – so I decided to make a A5 fabric ring binder cover with a detachable pencil case to hold them all. When they’ve finished you can just print and add more! There are lots of pencil case tutorials out there already so there was no point repeating them. Instead I used the one from the Little Red Window blog. It’s perfect for inside the folder.
Supplies:
A5 ring binder
Fabric – the Mini fabric is called ‘Hello my friend’ by Push Pin for Kokka. Sourced from The Eternal Maker . The pink plush fabric (see picture below) is ‘Cuddles Dimple’ in Watermelon also from The Eternal Maker. I also used a contrast fabric for the pocket and pencil case.
Binder cover: Approx. 44″ (112cm) x 12″ (31cm) main fabric and 6″ x 6″ (15cm) contrast fabric . Coordinating thread. Enough interfacing to line each piece.
Pencil case: 1 fat quarter outer fabric, 1 fat quarter lining fabric (I used the Mini fabric as lining and the Star fabric as the outer fabric. 1 zipper to match your outer fabric. Interfacing.
5 sew on poppers or the metal non sew press studs you can hammer in. If using sew on poppers then you may want to get a nice button to add to the tab.
1. Cutting out
- Using the Ring_binder_cover_dimensions cut out 1 main panel, 1 left panel, 1 right panel and 2 tabs from the main fabric. Then cut 2 pocket pieces from the contrast fabric. Use the pieces as a template to cut out matching interfacing pieces. Check your ring binder dimensions and adjust accordingly.

- Skip over to the Little Red Window ‘Simple Zipper Pencil Case‘ tutorial for dimensions for the pencil case and cut out.

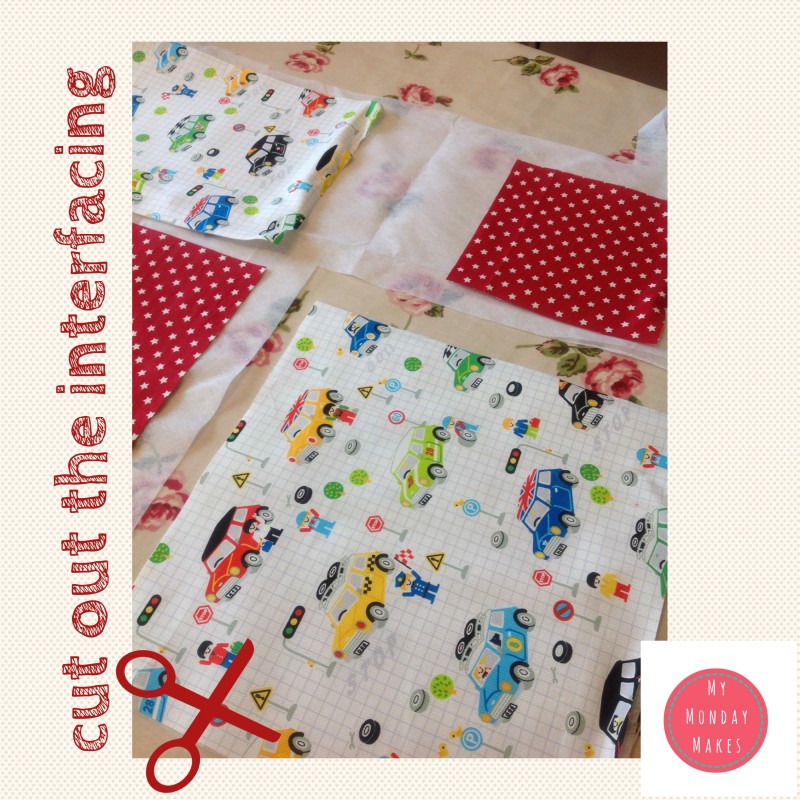
2.Iron on the interfacing
- Iron on interfacing to your main panel, left and right panels, tabs, pocket pieces and pencil case pieces (I swapped the thicker batting for iron on interfacing for the pencil case).
3. Sew the tab
- Place right sides of the tab pieces together and pin. Sew round, leaving one short edge open. Trim seam and cut the two corners where you’ve sewn.
- Turn right-side out and use a pointy thing (I use scissors or a pencil or crochet hook) to make the corners nice and pointy. Press.
- Topstich round the sewn edges (the raw edges will be enclosed when you attach it to the binder cover)
- Add one side of your popper or one side of your press stud at the sewn end of the tab. Don’t loose the other part of the popper!
4. Sew the pocket
- Place right sides of the pocket pieces together and pin. Sew round leaving one short edge open. Trim seam and cut the two corners where you’ve sewn.
- Turn right-side out and use your pointy thing to make the corners nice and pointy. Fold in the raw edges. Press.
- Position your pocket on the right panel and pin. Make sure that the raw edge is at the bottom so it will be sewn shut.
- Topstitch round to attach it to the right panel. Make sure you leave an opening at the top!

5. Make the pencil case
Before you skip over to the Little Red Window tutorial, if you’re using ‘non sew’ press studs then you’ll need to stop and add them before you join the back and front pencil case pieces. To add the press studs, measure 1 1/2″ (3.5cm) from each edge of the back piece (6″ x 9″ rectangular outer piece) and attached one press stud in each corner (see picture). Make sure they are facing outwards so they can be clipped to the left panel piece.

- Next add the opposite halves of the press studs to the left panel piece. To make sure they match up, place the left panel piece on top of the pencil case panel, right side down and mark where you can feel the studs through the fabric. When you’ve attached them it will look like this – BUT – I put mine a bit close to the edge so move yours in a bit!


Once the press studs are attached, finish the pencil case. If you’re using sew on poppers then you can sew them at the end.

6. Sew folder cover together
- Fold the right side of the left panel in 1/2″ (1 cm) and press. Repeat on the left side of the right panel and press. Pin then topstich.

- If using the non-sew press studs, attach the other half of the one you’ve attached to the tab to the right hand side of the main panel approx 1″ from the edge and in the middle. If sewing the popper on, you can do this at the end.
- Place the main panel face up and place the tab on the left hand side with the raw edges matching and the tab pointing inwards. Pin the tab in place.
- Place the right panel (with the pocket) face down on the left side of the main panel, then place the left panel (with the pencil case fixings) on the right. I’m getting confused writing this so check out the picture! Pin and sew round all four edges. Trim the seams and corners.

- Turn right side out, and press.
- Fold your folder in half backwards and slide into the folder cover. Attach pencil case to press studs and you’re done!


As I always have to make two of everything so life is fair for my kids, I also made one in my daughter’s favourite plush fabric…
